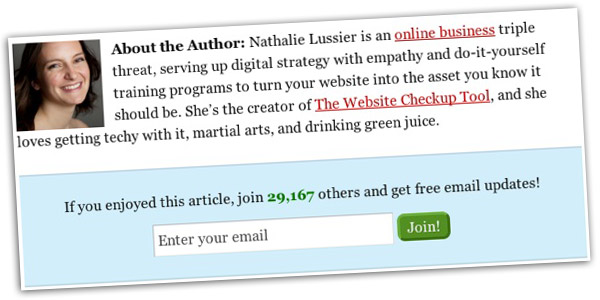
You’ve seen it on all the big blogs, and you’ve heard it can boost your conversion rates… but how do you add an opt-in box at the bottom of your blog posts if you’re not tech savvy?

With WordPress, you’re in luck! There are a lot of plugins that can come to your rescue that eliminate the need for complex coding on your part.
In this blog post, I’ll show you exactly how to add an opt-in box at the end of your WordPress blog posts. The simple plugin that we’ll use is compatible with all the email marketing systems out there, like Aweber and Mailchimp.

Step By Step: How To Add An Email Opt-In Box or Email Signup Under Your Blog Posts
For this tutorial, I’m going to assume that you already have a WordPress website set up, and ready to go.
Step 1: Install The PopupAlly Plugin

To add an opt-in box to your website, we’ll use the free version of the “PopupAlly” Wordpress plugin, which is available directly through the Wordpress Plugins dashboard.
Although the free version is all you need to get the job done, it’s worth mentioning that there is a paid version, PopupAlly Pro, that’s a little more robust.
It’s totally your call, and either will work fine.
Step 2: Log Into Your Email Management System
Once the plugin is installed, login to your email list management system. That means Aweber, Mailchimp, Infusionsoft, and the like.
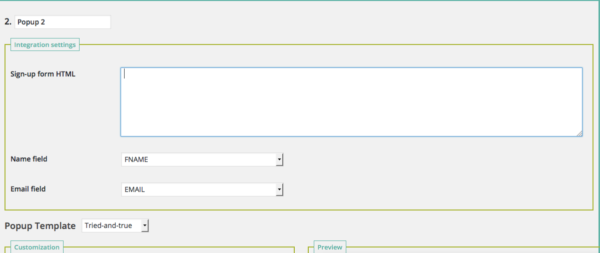
Once there, grab the web form code in full raw HTML (that means not the Javascript version).
This code might be a little tricky to find, depending on which email management platform you use. However, a quick Google search can bring you to the right spot.
Step 3: Add The Code To The PopupAlly Settings
Back inside your website, navigate to PopupAlly > Style Settings. Here, you can paste the code you just retrieved into an html slot.

What this does is make sure that, when someone enters information into your opt-in box, the info will be funneled properly to your email marketing system.
Step 4: Make Your Popup (or Opt-In) Look Amazing
Just below that box where you pasted the code, you can choose the style you want to go with for your opt-in box, and add in the header and any other text you want the opt-in to contain. You can also include a photo if you have something that depicts your opt-in freebie.
Play around with designs a little and have fun!
Step 5: Choose The Location For Your Opt-In
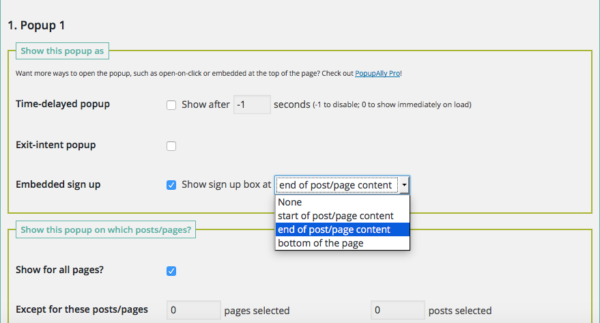
Now, it’s time to select the location you want for this opt-in box by heading to PopupAlly > Display Settings.
You can choose whether to place it at the top or bottom of your blog posts. You can also specify which website pages you don’t want the opt-in to appear on.
When you’ve got it right, hit save on your settings.

That’s all you have to do to display your new opt-in box, whether you want it to appear above or below the blog post.
Ta-da!
You’re done!
Here’s To Having a Strong Call To Action!
Now it’s your turn to share, I’d love to know what advice you have for people who are creating their opt-in boxes to display below their blog posts for the first time… leave a comment below and give us your best tip!
And if you haven’t already joined my free 30 day list building challenge, do it now.


